
Have you ever tried to use an ATM with just your ATM card and not your PIN? How about no ATM card and just your PIN? As I'm sure you know, you wouldn't be able to get your money. That's because your ATM requires you to use something you have (ATM card) and something you know (the PIN). If the ATM only required one or the other, it would be much easier for someone to get your money.
In the same way, if your WordPress site only requires the username and password (things you know) to log in, then if someone captures that info, they’ll be able to log in. But if your site also requires something you have, such as a code from your phone, that makes it much harder for someone to log into your account. This is known as two-factor authentication (sometimes written 2FA). Let's look at how to add another layer of security to your WordPress site.
Note: This page contains affiliate links. Please see Affiliate Disclosure.
So, you've decided to add two-factor authentication to your WordPress site, right? Good! First, you need an authentication plugin. I recommend the Two-Factor plugin. It works with an authenticator app on your phone to add a code that must be entered in addition to your username and password. If you don't have an authenticator app on your phone, I'll tell you how to get it later.
If for some reason you don't like the Two-Factor plugin, there are several other two-factor authentication plugins in the WordPress Plugin Directory. Here are a few to choose from:
Install and activate the plugin you choose.
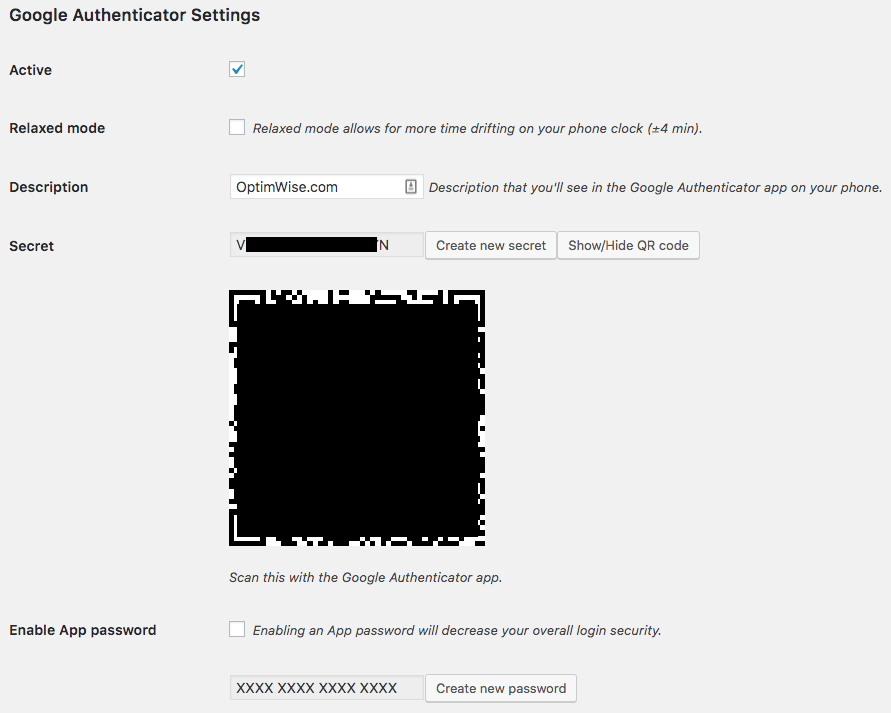
Next, you need to add your website to your authenticator app. Here's how to do that with the Google Authenticator plugin, which I used to use (it hasn't been updated in too long). The process is similar for other two-factor authentication plugins, but see the documentation for your plugin.
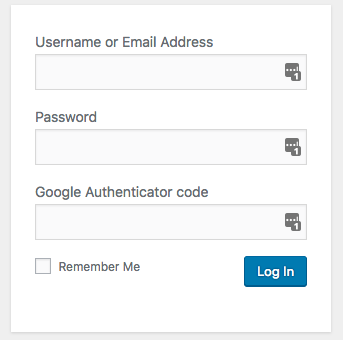
Now that you've enabled two-factor authentication for your website, here's how to use it when you log into WordPress.
I recommend that every Administrator account on your WordPress site use two-factor authentication. It wouldn't hurt to use it for other accounts too, but because the Administrator role has the most power, accounts with that role are the most critical to protect.
Don’t activate two-factor authentication for other users; ask them to do it themselves, so they can use their own phones.
If you get a new phone, install your authenticator app and add your WordPress account to it before discarding your old phone, if possible.
While you're at it, you can learn more ways of protecting your WordPress login in our post How to Secure WordPress Login & Admin Area.
I recommend the Authy app.
I highly recommend enabling two-factor authentication for other accounts that are related to your website or online marketing. A few examples:
Really, you should seriously consider using two-factor authentication for any accounts that offer it.
Look in the Security and Privacy sections of your account settings, or under Account or Profile. You could see it referred to as two-factor authentication, two-step verification, security codes, 2FA, or multi-factor authentication (MFA). You may see the words code or token.
If one of your accounts doesn't offer it as an option, contact the company and ask them to enable it, for the sake of the security of its users.
It's an unfortunate reality that WordPress websites are frequently targeted by hackers. You're wise to enable two-factor authentication to increase your site's security. If you'd like the peace of mind of knowing that WordPress experts are taking care of your site's security, contact us!
yes!!
that works
thanks for this awesome article